
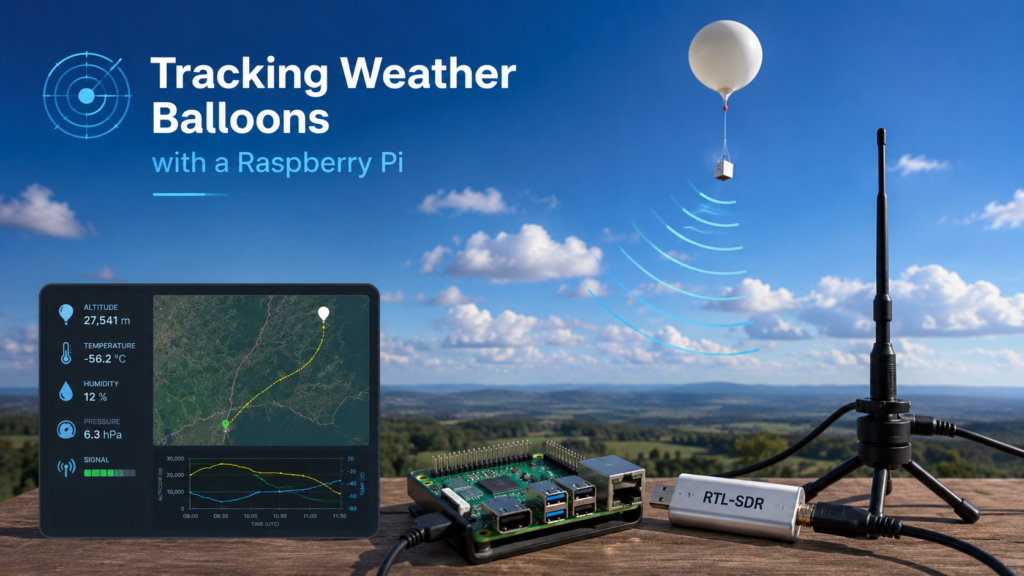
For weather nerds, radio hobbyists, emergency communicators, and curious people with a Raspberry Pi, there is another neat part: many of these sondes can be received at home with a simple software-defined radio setup.
What Is a Weather Balloon?
A weather balloon is a large balloon, usually filled with hydrogen or helium, that carries a radiosonde high into the atmosphere. As it rises, the air around it gets thinner and colder. The balloon expands until it eventually bursts, and then the radiosonde falls back to Earth under a small parachute.
The radiosonde itself is a small instrument package suspended below the balloon. As it rises, it sends back data about pressure, temperature, humidity, and GPS position.
That data helps meteorologists understand what is happening above the ground, not just at the surface. Surface weather stations can tell us what is happening near your house, airport, school, or weather station. Weather balloons tell us what is happening thousands of feet up, where storms build, winds shift, and weather systems organize.
Why Sondes Matter
Weather forecasts are not made from one single source of information. Forecast models use data from satellites, radar, aircraft, buoys, surface stations, and weather balloons.
The reason sondes are still important is simple: they directly sample the atmosphere. They physically travel through the air and report what they encounter.
A radiosonde flight can help answer questions like:
- What is the temperature above the surface?
- How much moisture is in the air?
- How strong are the winds aloft?
- Is the atmosphere stable or unstable?
- Are storms likely to grow tall and strong?
- Where might a balloon drift after launch?
That information is especially useful for severe weather forecasting, aviation, fire weather, marine weather, and storm prediction.
Can Regular People Receive Them?
Yes. That is the fun part.
A radiosonde transmits its data by radio as it flies. With the right antenna, a low-cost RTL-SDR receiver, and a Raspberry Pi 4, you can build a small receiver station that listens for these signals, decodes them, and shows live balloon positions.
You are not controlling the balloon. You are not transmitting anything. You are simply receiving a signal that is already being broadcast by the radiosonde.
Many hobbyists use software called radiosonde_auto_rx, an open-source project designed to automatically receive and decode radiosonde telemetry using software-defined radio hardware. Decoded positions can also be uploaded to public tracking services like SondeHub, which provides live and historical radiosonde tracking.
What You Need
For a basic Raspberry Pi radiosonde receiving station, you need:
Raspberry Pi 4
A Pi 4 is a solid choice because it has enough power to run the decoder, web interface, networking, and logging without much trouble.
RTL-SDR USB Dongle
An RTL-SDR is a low-cost USB radio receiver. It lets your computer listen to a wide range of radio frequencies.
Antenna for the 400 MHz Range
Many weather sondes transmit around the 400–406 MHz area. A basic antenna can work if you are close to a launch site, but an outdoor antenna tuned for this range will perform much better.
MicroSD Card
Use a reliable card. A 16 GB or 32 GB card is usually plenty.
Power Supply
Use a good Raspberry Pi power supply. SDR dongles can be picky, and weak power can cause strange problems.
Internet Connection
This is optional for local receiving, but useful if you want to upload decoded data to SondeHub or view the station remotely.
Case and Cooling
The Pi and SDR may run continuously, so a ventilated case or small fan is a good idea.
How the Setup Works
The basic flow is:
- A weather balloon launches with a radiosonde attached.
- The radiosonde transmits data by radio.
- Your antenna picks up the signal.
- The RTL-SDR sends the radio signal to the Raspberry Pi.
- The Pi runs decoding software.
- The software displays the balloon’s location, altitude, signal strength, and flight data.
- Optionally, your station uploads the decoded telemetry to SondeHub.
Once set up, this can run mostly unattended. Your Pi can sit on a shelf, in a shack, near a window, or connected to an outdoor antenna, listening for sondes as they pass within range.
Installing the Software
The most common software path is radiosonde_auto_rx. It is built for automatic reception and can upload data to services including SondeHub.
A beginner-friendly install usually starts with updating the Raspberry Pi and installing the needed tools:
sudo apt update
sudo apt upgrade -y
sudo apt install git python3 python3-pip python3-venv rtl-sdr sox -y
Then clone the project:
git clone https://github.com/projecthorus/radiosonde_auto_rx.git
cd radiosonde_auto_rx
From there, follow the project’s current install instructions, because dependencies and supported radiosonde types can change over time. The official project page is the best place to follow the latest setup steps:
https://github.com/projecthorus/radiosonde_auto_rx
Once configured, the software can scan for active sondes, decode them, and show them through a web interface.
What Kind of Range Can You Expect?
Range depends heavily on antenna placement.
If your antenna is indoors, low to the ground, or blocked by walls, your range may be limited. If your antenna is outside, higher up, and clear of obstructions, you may receive sondes from much farther away.
Because radiosondes fly high in the sky, they often have a strong line-of-sight path to your antenna. That means you may hear one even if it launched from a site many miles away. A better antenna and better placement usually matter more than expensive hardware.
For a starter station, try a simple outdoor antenna first. If you enjoy the hobby, upgrade later.
What Will You See?
When your station receives a radiosonde, you may see information such as:
- The sonde type
- Frequency
- Signal strength
- Latitude and longitude
- Altitude
- Temperature
- Humidity
- Pressure
- Climb rate or descent rate
- Predicted landing area
- Flight path on a map
This is where the hobby gets addictive. You are not just looking at a generic weather map. You are watching a real instrument package flying through the atmosphere in real time.
Can You Recover a Fallen Sonde?
Sometimes, yes.
Once the balloon bursts, the radiosonde descends under parachute and eventually lands. Some hobbyists track them and recover them.
But there are a few common-sense rules:
- Do not trespass.
- Do not enter private property without permission.
- Do not climb trees, towers, fences, or utility poles.
- Do not touch anything near power lines.
- Do not interfere with airports, military property, restricted areas, or emergency scenes.
- If the sonde lands somewhere unsafe, let it go.
In many cases, a recovered radiosonde is simply kept as a curiosity, used for educational purposes, donated to a school or science club, or disposed of responsibly.
Why Use a Raspberry Pi Instead of a Laptop?
A laptop works fine for experimenting, but a Raspberry Pi is better for a permanent station.
A Pi is small, quiet, inexpensive to run, and can stay on 24/7. You can mount it near the antenna, connect it to your network, and check the web interface from another computer.
That makes it ideal for a “set it and forget it” receiver.
A Simple Beginner Station Layout
Here is a practical setup:
- Outdoor 400 MHz antenna
- Short coax cable into the house
- RTL-SDR dongle connected to Raspberry Pi 4
- Raspberry Pi connected to Ethernet or Wi-Fi
- radiosonde_auto_rx running as a service
- Web interface available on your local network
- Optional upload to SondeHub
This setup is simple, affordable, and powerful enough for most hobbyists.
Tips for Better Reception
- Put the antenna as high as practical.
- Keep the antenna away from computers, power supplies, and LED lights.
- Use quality coax if the cable run is long.
- Keep the RTL-SDR cool.
- Use a powered USB hub if the Pi has power issues.
- Start simple before buying expensive antennas.
- Check SondeHub to see when balloons are usually active near you.
Avoid overcomplicating the first build. The goal is to receive your first sonde. Once that works, improving the station becomes much easier.
Is This Only for Ham Radio Operators?
No amateur radio license is normally needed to receive signals. You are only listening. You are not transmitting.
That said, many ham radio operators enjoy radiosonde tracking because it combines radio, weather, antennas, mapping, and a bit of adventure. It is also a great educational project for students, weather spotters, makers, and anyone interested in the atmosphere.
Why This Hobby Is So Cool
Radiosonde tracking is one of those hobbies that connects several worlds at once.
It is part weather science.
It is part radio.
It is part Raspberry Pi project.
It is part mapping.
It is part treasure hunt.
And unlike some radio projects where you may wait a long time to hear something interesting, weather balloons are launched regularly from many locations. When one is in range, you can watch the whole flight unfold from launch to burst to landing.
Useful Links
- radiosonde_auto_rx on GitHub
- SondeHub Live Tracker
- National Weather Service Upper Air Observations
- NOAA Storm Prediction Center Soundings
Final Thoughts
Sondes may be small, but they play a big role in weather forecasting. These little instrument packages ride weather balloons high above the ground, sending back real atmospheric data that helps meteorologists understand what is happening overhead.
With a Raspberry Pi 4, an RTL-SDR dongle, a decent antenna, and radiosonde decoding software, an average person can build a home station that receives these signals directly.
It is an affordable project, a useful learning tool, and a surprisingly fun way to see the atmosphere in motion.
The next time you see a weather forecast, remember: somewhere above us, a small box hanging under a balloon may have helped make that forecast possible.